|
|
|
| |
DigiBook® makes it very easy to create a Photo Album, but let's take one Easy Step Further and change the look of your album. You will be amazed how big an impact it will have on your album!
Make your albums sparkle with these free skins and personalize your album the way you wish! |
 |
|
|
|
 |
|
|
 |
When the dialog window opens, click [Save] to save the skin file to your hard drive.
|
| |
|
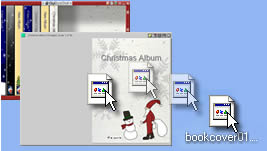 |
Add the bookcover to the program
To add the bookcover to the program, simply drag and drop the skin file over the a bookcover of any album. The bookcover will be added to the program. |
|
|
Change the bookcover of an album
Now, let's change the bookcover to the one you just installed.
Open Album Settings by clicking the button located on top right corner of an album.
In Album Settings, under [Disp1], click [Change Bookcover]. Bookcover window will open. |
|
 |
Find the bookcover skin you just installed. Click the skin to highlite it, and click [Select]. |
|
|
 |
When the dialog window opens, click [Save]. The layout skin will be downloaded to your computer.
|
| |
|
 |
Once the file's downloaded, drag and drop the layout file anywhere on an album page.
When the dialog window opens, click [YES] to apply the layout to the album.
*The new layout will be accessible from Album Settings, so you can apply the layout to any other album. |
|
|
Where is the new layout saved?
Open Album Settings by clicking the tool button located on top right corner of an album.
In Album Settings, under [Disp1], click [Change Layout]. Bookcover window will open. |
|
|
Choose [Others] and find the layout skin you just installed. Click the skin to highlight it, and click [Select].
Now that you know how to change the Bookcover and Layout of your album. Download Free skins now and start decorating your albums to give them more personality! |
|
|
|
| |
|
|
|