|
 |
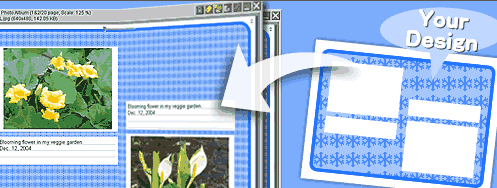
While DigiBook® comes with a selection of layout skins, you can also create your
own design and apply to your albums. If you use any graphic program, you can design
your original layout background, or even use one of your photos to create your own
layout! |
| |
| |
| |
How to create your own album layout |
| |
|
| |
 |
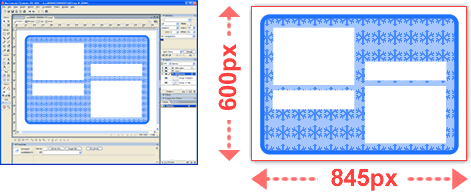
Create an graphic image using a graphic design tool of your choice. Make sure the image is sized at [845 px width x 600 px height], and save the image either as Jpeg or Gif.
Dimension: 845(px) width x 600(px) height
Save as Jpeg or Gif |
|
|
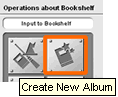 |
Create an empty new album. To create a new album, right-click on a bookshelf to open a Menu Sheet. Click [Create New Album] located near the top left corner. |
|
| |
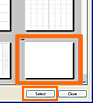 |
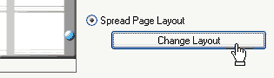
When Album Settings window opens, click [Change Layout] button for Spread Page Layout and select a layout that takes up the entire spread as shown on the left. Click [Select] to close the window. Close the Album Settings window. |
|
| |
 |
| |
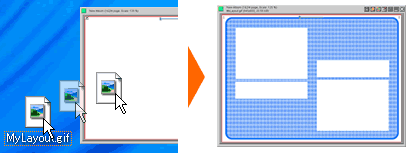
| Open the newly created empty album, and drag your graphic image onto the album spread page. The graphic image will be added to the album and cover the whole spread page. |
| |
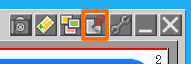 |
(1) Now we will add frames to the album. But before we go ahead to do it, we need to "Unlock" the album layout. Click the Pushpin button as shown once to unlock the layout, so you can move or resize frames that you will add now. |
|
|
|
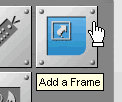 |
(2) Once the layout is unlocked, right click anywhere on the spreadpage to open a Menu Sheet. Click [Add a Frame] located on the left side of the Menu. |
|
| |
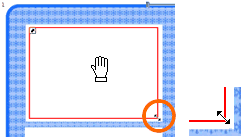 |
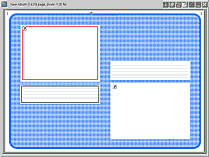
(3) An empty frame will be added. Now, let's move the frame to the right place, and resize it to match your layout graphic. Drag any corner of the frame to resize it. |
|
| |
 |
(4) Once the frame's resized and located to the right place, it's time to add a text frame. However, if you don't need a text frame, you are welcome to skip over to (7).
To add a text frame, right-click on a photo frame you just added and open a Menu. Click [Preferences] button, and select [ Frame Settings] |
|
| |
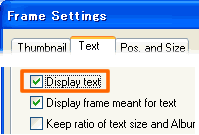 |
(5) Click [Text] tab to bring up the Text Settings.
Click in the checkbox to enable [Display text]. |
|
| |
 |
(6) Repeat (2) through (5) to add a text frame for another photo frame.
If you are happy with the look of your layout graphic, now it's time to save this spread page as an album layout.
Before you save the layout, lock your layout by clicking the Pushpin icon again. |
|
| |
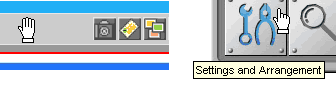 |
(7) Right-click anywhere in a gray area outside the spread page to open a Menu. Click [Settings and Arrangement]. |
|
| |
 |
Then select [Layout], and [Save Spread Page Layout Data].
A dialog window will open to tell you the layout's saved. |
|
| |
 |
Now let's apply your newly saved layout to your existing album, or a new album.
Open Album Settings for any of your album and click [Change Layout] under Spread Page Layout. |
|
| |
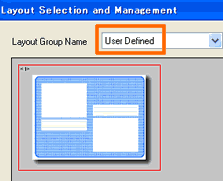 |
Your layout is save in [User Defined] layout section. Click the dropdown menu to choose User Defined. Now click to select your new layout and click [Select] to close the Settings. |
|
| |
| Back to top > |